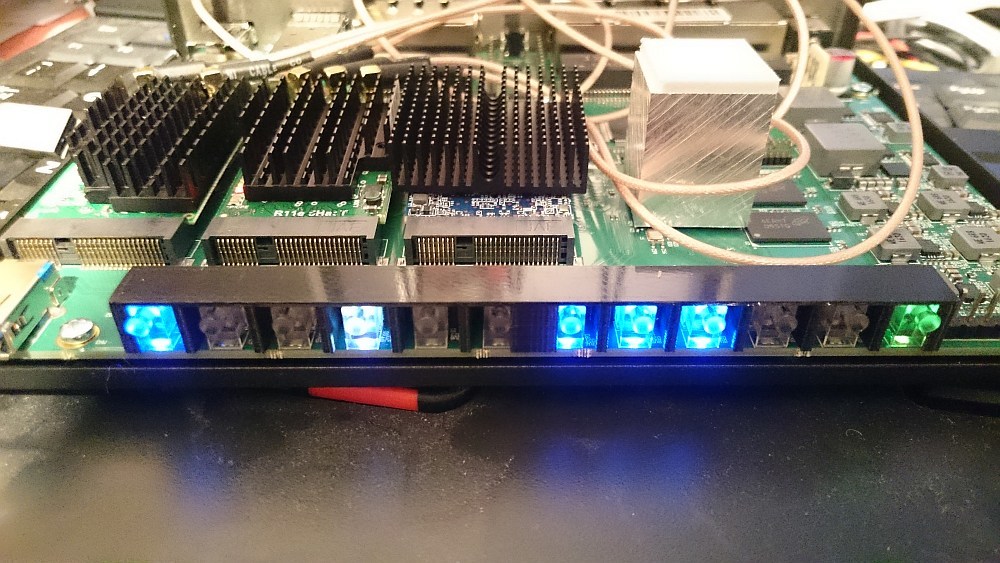
Here (Thingiverse - Digital Designs for Physical Objects) you can find a 3D model for printing a LED cover which shields the LED’s from cross-light from each other. Especially, when the brightness is set relatively high, it looks much better with such a shield.
How do you download that thing?
yeah, i also would like to download one right into my omnia ![]()
sorry, here comes the link from where you can download it: http://www.thingiverse.com/thing:1872389
Where did you print that thingi? Had several requests to online 3d print shops, was between 10€ to 36€, not included shipment… 
Wow, good job.
I thought about using a heat-shrink to light-insulate the LEDs, but your cover seems to be a much better solution.
Use https://www.3dhubs.com/ and select a hub near you if possible, maybe you could pick it up, i got mine printed with shipping it totaled to ~13€.
2 Likes
Gorgeous! 8,43€ incl. shipment. ![]()
Edit: received 2 for price of one! Wohoo!
If any german turristi wants the other one, just leave me a message, you will get it for 4€ plus shipment of choice.
Edith says: Sold to nerdpunk.
Wonderful! I just ordered two prints, for a total price of 4,8 €, including shipping. 
I ordered one as well and picked it up 600 meters from where I live. 
I just went couple of floors down and simply printed it out… 
Someone will now say they simply pressed print and picked it up from the printer next to Omnia next to them. Or that they printed it directly onto the Omnia board.
And they will win this contest 
Just a warning for others. The printout has to go smoothly over the LED plastics. Do not use any force, as such would deform some of the LED plastics, making it very difficult to assemble the router again properly. 
I’m writing it from my own experience when I printed the separator with 100% infill which made it actually a little bit smaller. My LEDs are no longer in line, which means it’s almost impossible to put over them the cover and pass them through all 12 holes at the same time.
1 Like
yeah, i managed to do that, too, even without the separator… it needs some time and lots of fumbling now, to put the cover back on ![]()
Had the same problem, but with separator it seemed to be easier.
Same here, managed to get one LED plastic out of the row somehow, on day one… 
Thanks for sharing your design, Tom. I am looking to receive mine now
1 Like
This looks great. Thanks man, for this.
I was already thinking to make something similar myself for days.
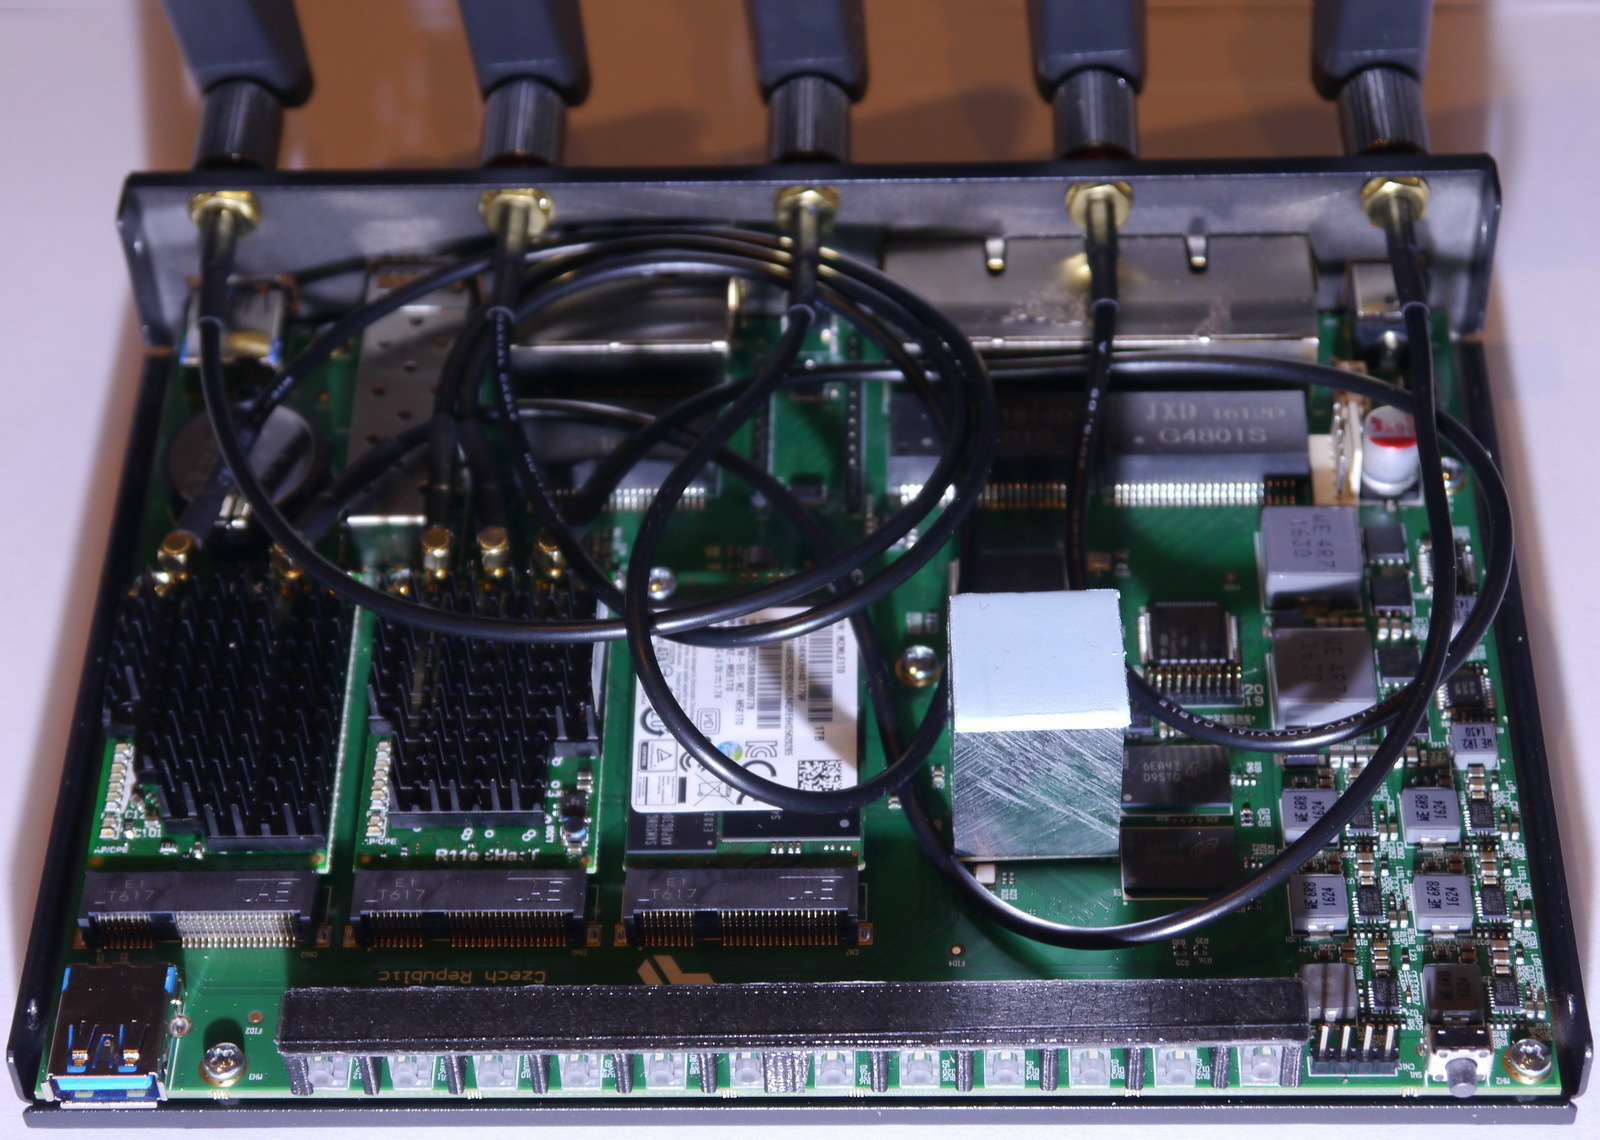
The cross-light of the LED’s is indeed making it harder to see witch LED is on or off.
** WARNING **
If you do not own a 3D printer where you can iterate on the prints, I caution you against having this printed by a service. I paid to have one printed and it looked great. However, it went over the LED light pipes a bit snug. It wasn’t quite wide enough to fit over the leftmost and rightmost LED light pipes, especially as I slid it down towards the PCB. I think the “exterior walls” of the light shield were too thick.
After a bit of wiggling, I was able to fully seat the light shield BUT it caused both of the LED light pipes on the the ends to tilt slightly. And then I had big problems as you cannot get the metal case back on properly since the protruding light pipes do not align with the circular holes in the case. The tolerances are very tight.
After more than hour of hacking around, I ended up cutting off the left and right ends of the light shield so it went on without putting undue pressure on the LED light pipes, which I had carefully taped back into position.  It was a kludge but it worked and I was get case lid back on.
If you attempt to put one of these into your router, STOP pressing if there is any resistance as you slide it down over the light pipes. Do NOT force it. The LED light pipes are very tenuously connected to the PCB and with just a little pressure, they will come loose.
Side note: Unfortunately, I don’t know enough about 3D printing to tell my printing service what to do differently.
I got mine printed with 75 Micron PLA, less Microns is better for details, print fine structures in 100 Microns and below.