I have just tried to upgrade to the latest TOS5 since I have been only on the 3.11.21.
To not risk anything I imported the latest medkit as a snapshot with the schnapps undocumented -f option, which seemed to work alright and then rollbacked to the new factory snapshot.
After reboot however nothing worked. No internet, nothing loaded on the address 192.168.1.1 , no ssh.
If that is the case, it is nice that I was cautious. After that I could just rollback with the 2LED rollback reset method and I am on 3.11.21 again.
I there any working version of TOS5 medkit?
Btw I have also tried the schnapps import wihout the -f option with an info file, but that caused some weirdness in the schnapps list: @293 | pre | | 2020-12-30 21:46:34 +0100 | Manual Medkit import
11 | rollback | 76.26MiB | 2017-09-28 07:41:20 +0000 | Rollback to snapshot factory
84 | rollback | 45.59MiB | 2018-03-22 20:15:00 +0100 | Rollback to snapshot 83
86 | rollback | 56.41MiB | 2018-03-30 17:16:24 +0200 | Rollback to snapshot 85
249 | post | 25.89MiB | 2020-06-04 13:36:24 +0200 | Automatic post-update snapshot
250 | pre | 25.89MiB | 2020-06-04 13:41:13 +0200 | Automatic pre-update snapshot
251 | post | 25.93MiB | 2020-06-04 13:51:58 +0200 | Automatic post-update snapshot
263 | pre | 25.93MiB | 2020-08-22 21:21:28 +0200 | Automatic pre-update snapshot
264 | post | 25.93MiB | 2020-08-22 21:23:58 +0200 | Automatic post-update snapshot
270 | pre | 25.93MiB | 2020-09-21 02:09:57 +0200 | Automatic pre-update snapshot
271 | post | 25.93MiB | 2020-09-21 02:11:30 +0200 | Automatic post-update snapshot
280 | pre | 25.94MiB | 2020-11-24 03:29:07 +0100 | Automatic pre-update snapshot
281 | post | 25.96MiB | 2020-11-24 03:31:36 +0100 | Automatic post-update snapshot
282 | time | 26.00MiB | 2020-11-29 01:05:02 +0100 | Snapshot created by cron
283 | time | 26.00MiB | 2020-12-06 01:05:03 +0100 | Snapshot created by cron
284 | time | 26.00MiB | 2020-12-13 01:05:04 +0100 | Snapshot created by cron
285 | time | 26.00MiB | 2020-12-20 01:05:04 +0100 | Snapshot created by cron
286 | time | 544.00KiB | 2020-12-27 01:05:03 +0100 | Snapshot created by cron
287 | pre | 26.32MiB | 2020-12-30 18:26:34 +0100 | Automatic pre-update snapshot
Instead of getting to the last position, it went to the first one. I deleted it, but it is still in the list, although btrfs does not show it already and schnapps cant delete it again either saying: “WARNING: Snapshot number 293 does not exists!” It also does not show any size for that snapshot. And why is there a ‘@’ character before the id? How to get rid of this snapshot?
This is the medkit of the stable version of Turris OS for Omnia, taken from Official Repo: HBS Turris OS - Stable.
The best way is from a USB stick. Format it with ext4 or fat32 and make sure you perform the procedure correctly Factory reset on Turris Omnia.
You must use the 4 Led procedure (from power to 3).
The medkit works 100%, so something must be wrong with the procedure.
Try deleting the snapshot from reForis.
The most convenient thing in this great leap is to export the snapshot to another stick, so you can try it in complete serenity. At the same time, the flash method of the new medkit also deletes all configurations.
Hi,
thanks for the feedback. I there is also 4LED method to re-flash, but I wanted to avoid it so that I dont lose any snapshot and settings in it. Although I have actually made an export of my currently used TO 3.11.21 snapshot so that I can use it as a medkit.
But I do not really understand what could be the difference between re-flashing and importing the 5.1.4 image as a snapshot and booting into it?
Since I am using TO as a NAS, I hope reflashing wont do any harm on the mounted other disk partitions
Also I am not sure how to setup it again (once flashing will be successful) my NAS, originally I used Forist gui for that. And that thing can do it only by formatting, which I obciously dont want to do it anymore. But I have seen Luci has some settings for it too, so maybe I can do it there, if the disk will be recognized properly after the upgrade as well.
Meanwhile, if you import the medkit as a snapshot it should not change the result, i.e. the disk will be clean and you will have zero configurations, because the image is from the stock firmware (in this case HBS) and all the things you added are still missing.
Maybe you can’t use the medkit as a snapshot, because they’re not quite the same thing (Schnapps, read the Export and import part). The disks part of the NAS are not touched. The only disk involved is the one where the new firmware is flashed (eMMC or mSATA for example). For the NAS configuration it should have remained the same as before, certainly on the command line side (I suppose also in Foris). Good luck.
Quite likely the reason is a malformed .info file you are using. I’m assuming you created it by hand? You can do:
mount -o subvol=/ /dev/mmcblk0p1 /mnt/.snapshots
find /mnt/.snapshots -name "*293*"
to find any relates btrfs subvolumes and .info files. You can then remove any offending entries using either rm or btrfs subvolume delete. Don’t forget to umount /mnt/.snapshots once you’re done.
On a side note to future readers: If you want to upgrade from TOS 3 to 5 and want to “to not risk anything” I’d recommend sticking with the supported way rather than using undocumented procedures and schnapps options.
Thanks your your tips. I had indeed a crafted info file but I think that was for just the “normal” medkit imoprt (as simple snapshot, so without -f option, which is for factory snapshot replacement), I think the -f option didnt need any info file. But I have also thought about searching for it, but I was searching for *.info instead of the actual number of it, so that could be a good idea.
But in the meantime I have already upgraded it the official way, so I cannot try that anymore.
So basically I redownloaded the image just to be sure and made an md5 checksum check and copied to USB and reflashed it, and luckily it worked.
Now I have spent some time to reconfigure the router again. Thanks god NAS is also working now with all the steam games
TVHeadend gui also seems to work though (have not connected the tuner yet though)
Nextcloud is unfortunately not working yet for some reason, I got " 503 Service Not Available" error.
Yes, unfortunately there isnt any service called nextcloud, bt I had to start a php7 and mysqld and lighttpd service to make it work.
The strange thing is that almost none of the services can autostart even after explicitly enable the services from the command line. nfsd, lighttpd, rpc, rpcbind, mysqld everything has to be started manually, which is a pain.
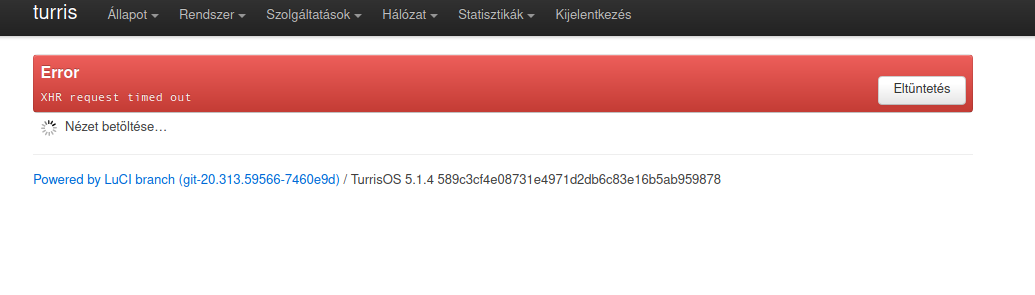
And I cannot access the related page on Luci, when clicking it, it starts hanging, and got “XHR request timed out” error message.
I recently tried extcloud too, right on your own version of Turris OS (and in fact I even opened a thread here Nextcloud from reForis - limitations, looking for feedback). I followed this guide Nextcloud server on Turris and it was super easy. I don’t remember activating anything by hand (yes, maybe there isn’t a nextcloud service), and the whole web service stack (php, mysql and perl) is installed and started automatically.
after enabling all the services now everything seems to be fine, I think it was the rpcbind that stopped nfs and my NAS from working properly. It has also magically fixed the time out on the mentioned Luci page.