The process is relatively straightforward if you have some experience building your own system; I strongly advise to follow the instructions step by step carefully.
Some difficulties I encountered:
The pigtails might be difficult to disconnect - take your time and don’t just yank them. Otherwise you might have to repair a connector
Some of the holes in the chassis might not be a perfect fit - in my case the 2 and 4th holes have a straight notch to hold the antenna connectors in place… but the connectors did not so I have to widen the holes a bit
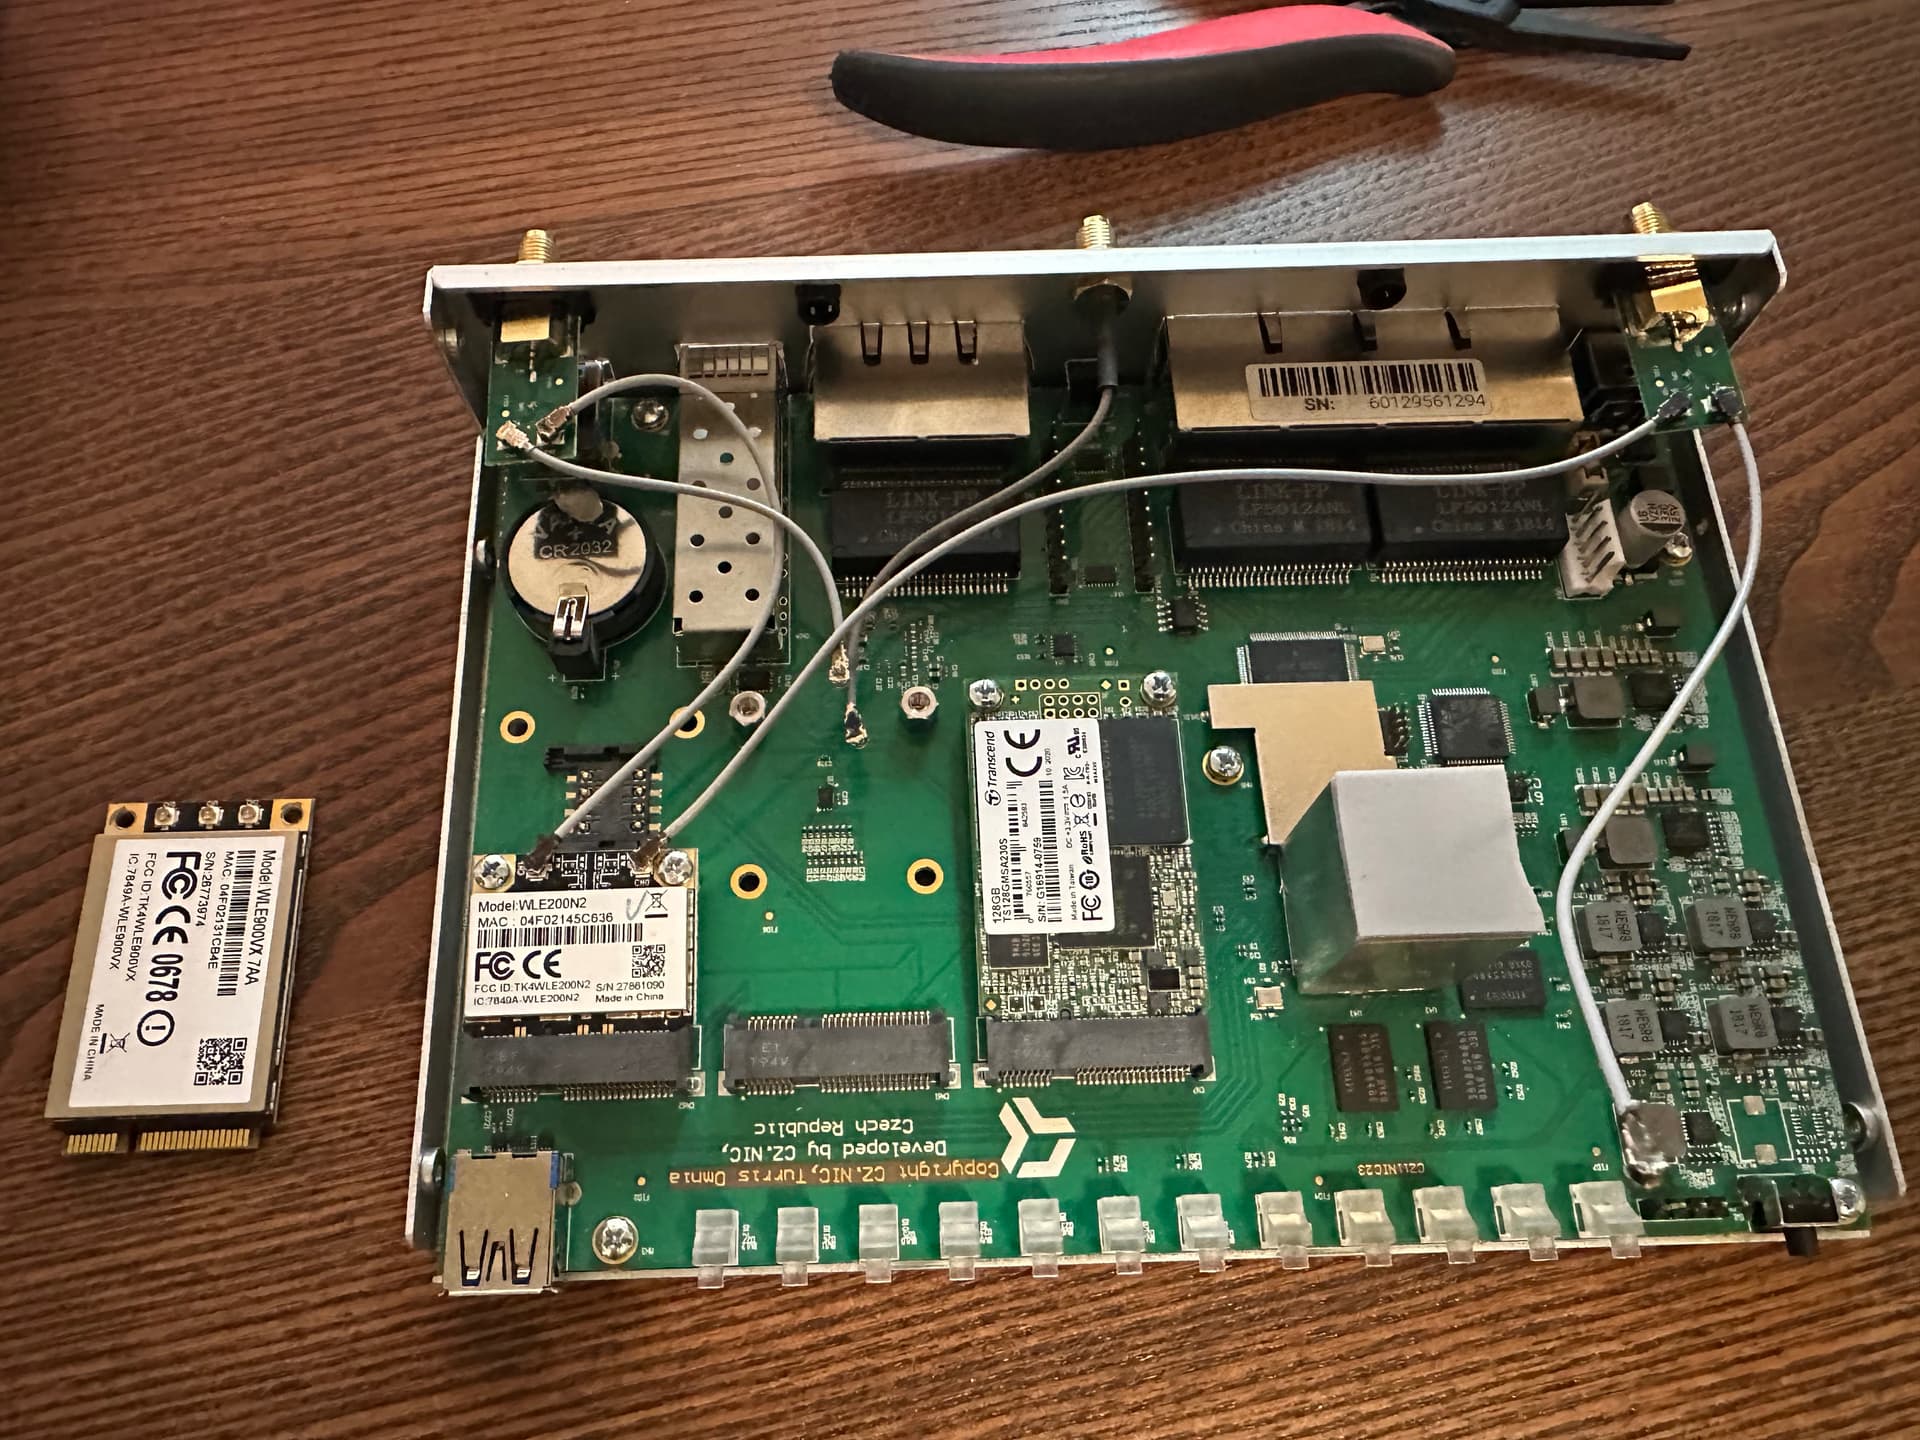
Each of your installations is unique. In my case, I went for a full factory reset after installing the upgrade package. But in my case I have installed an internal SSD.
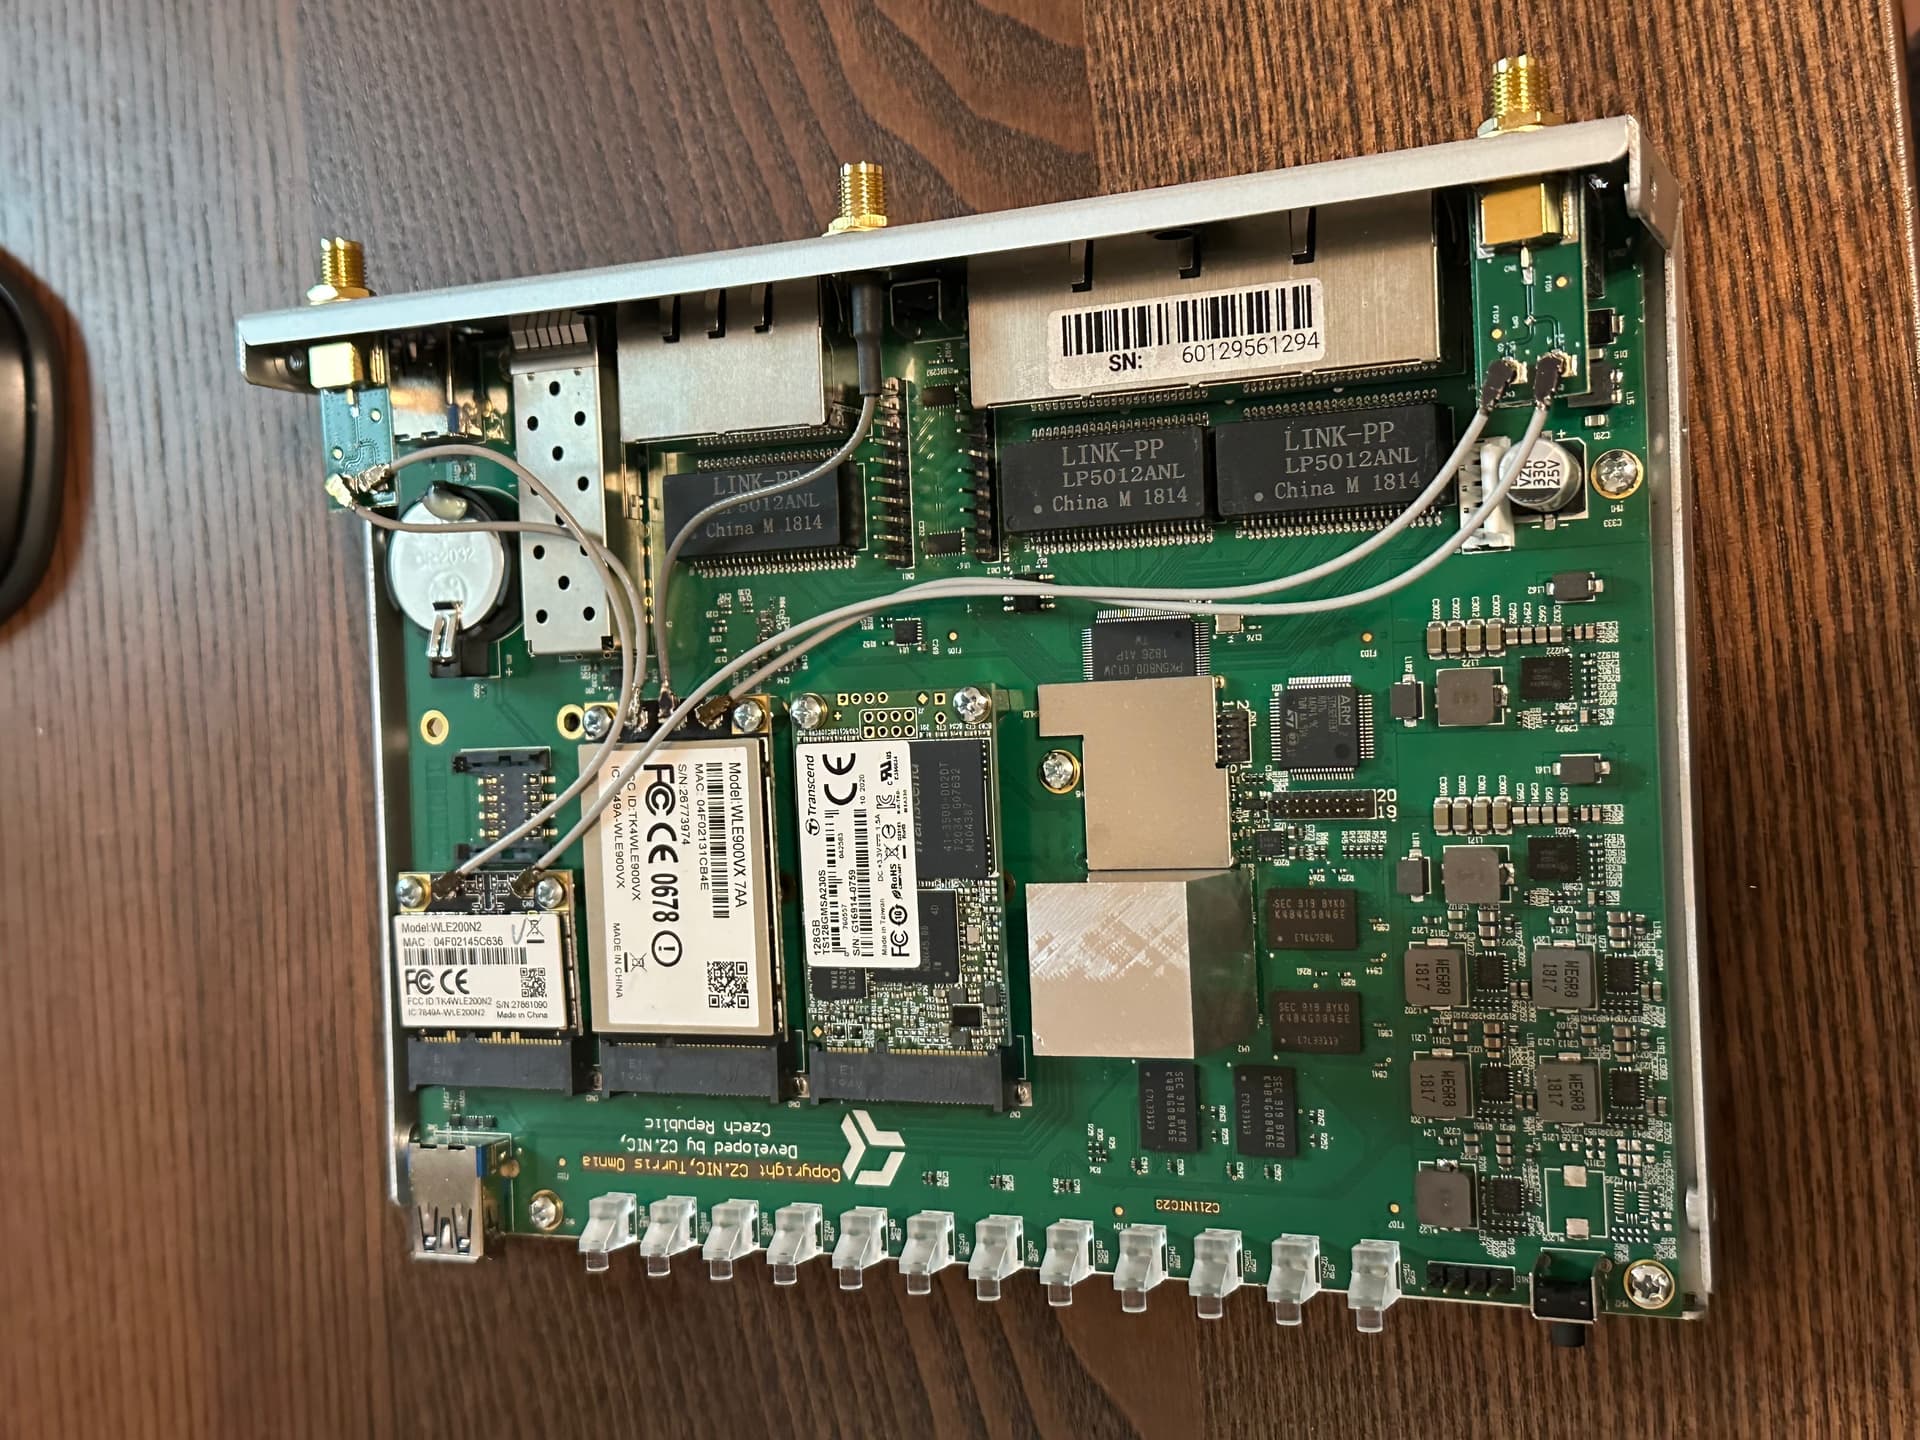
In any case, things seem to be working as normal. Below are some photos.
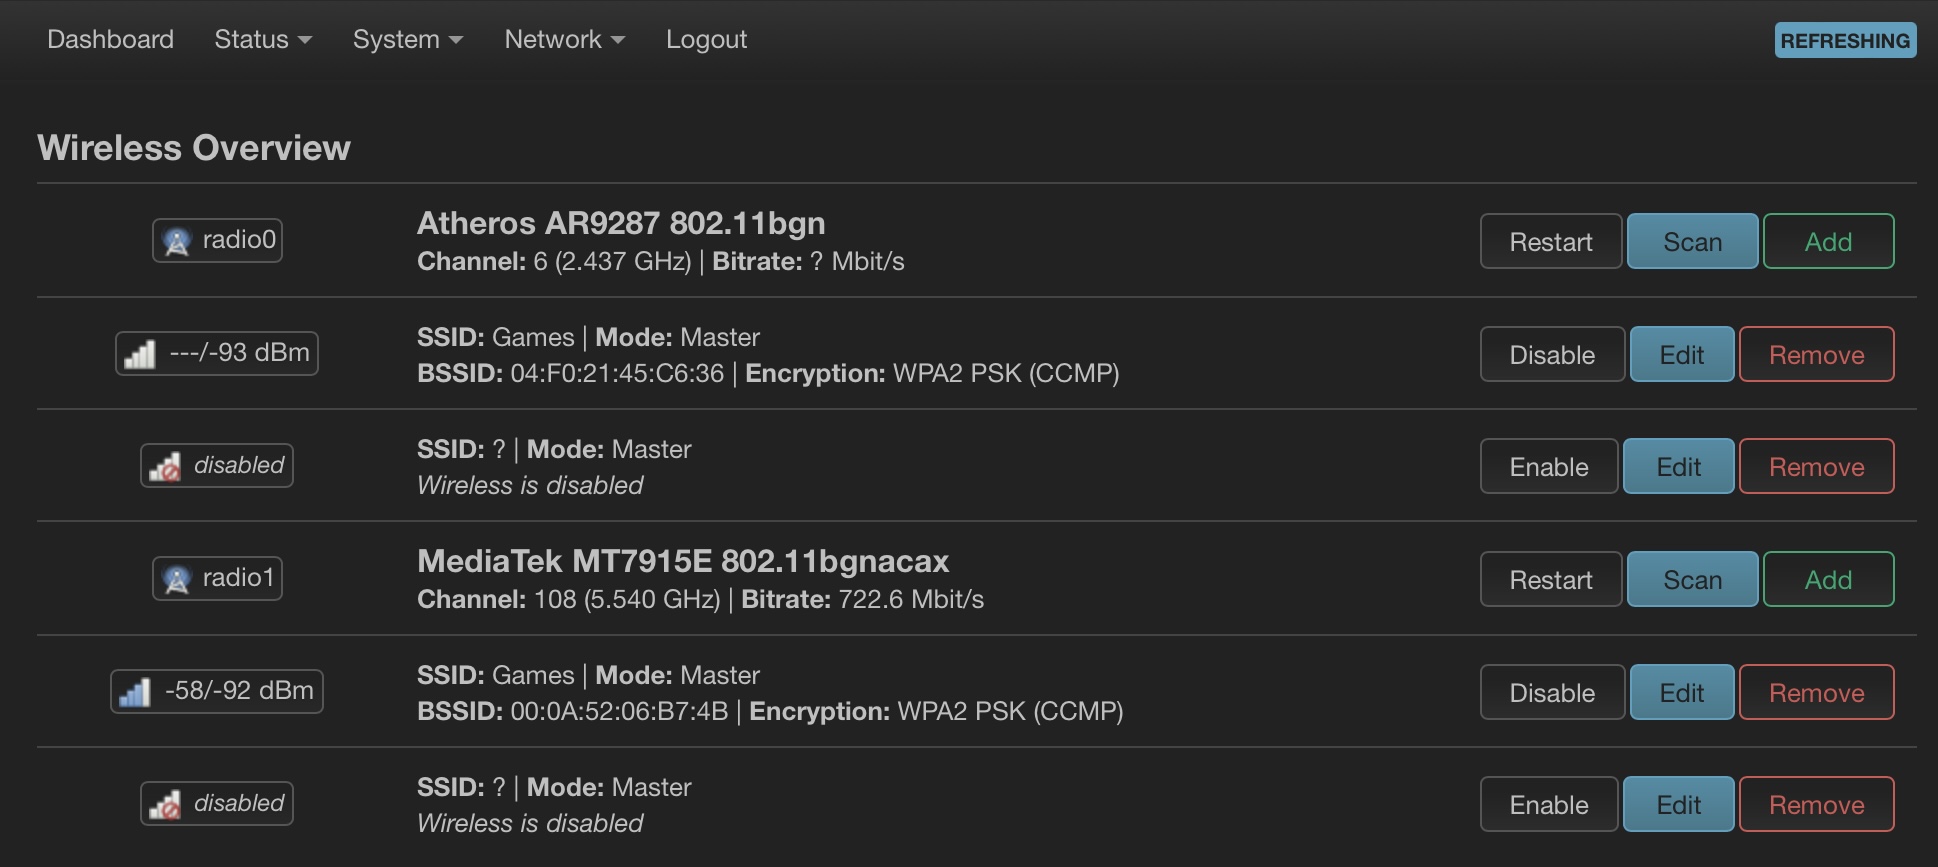
You seem to have the diplexers connected wrong. The small Wi-Fi card should be attached to 2.4 ports ports while the big card should be connected to 5G ports of diplexers. On the photo I see that the two cables from one card lead to the left port of one diplexer and right port of the other. That does not seem correct.
Hi,
could you please measure distance of the side antennas from the corner of router?
Today I have received upgrade kit and as I am a NAS casse owner I’ll be drilling the new holes on my own
So I have a rough idea where they should be placed…
Thanks
Thank you. I will check the connections later today when I am back home, but I wish there was a schematic of the connectors on the cards (CH0, 1, etc) so we could double check the connections.
I’ll measure them for you but I think you can approximate them from the physical dimensions at the specs: Turris - Specifications
For example, I bought a couple more diplexers for me to experiment, and I bought the 15cm cables which would let me run cables from side to side of the router.
You have nothing to drill. just use the holes at the rear side. There are originaly 5 holes, two of them have plugs. Just unplug the plugs and you are ok. Jo have to only adjust the holes to round shape (original holes and diplexers have a little bit “flat” upper part).
Thanks a lot, today I have upgraded. I’ve got bit non standard setup in NAS case so I have enjoyed a bit of drilling
I’ll post some picture a bit later