I wanted to tell you i managed that openVPN is working. I’m using the Turris Omnia with PrivateVPN from Sweden (Best Country in the world by human rights and ethical standards). Btw. Speed with VPN over PrivateVPN: 50Mbps without VPN & 38Mbps with VPN.
But at first, what is working and how you can set it up:
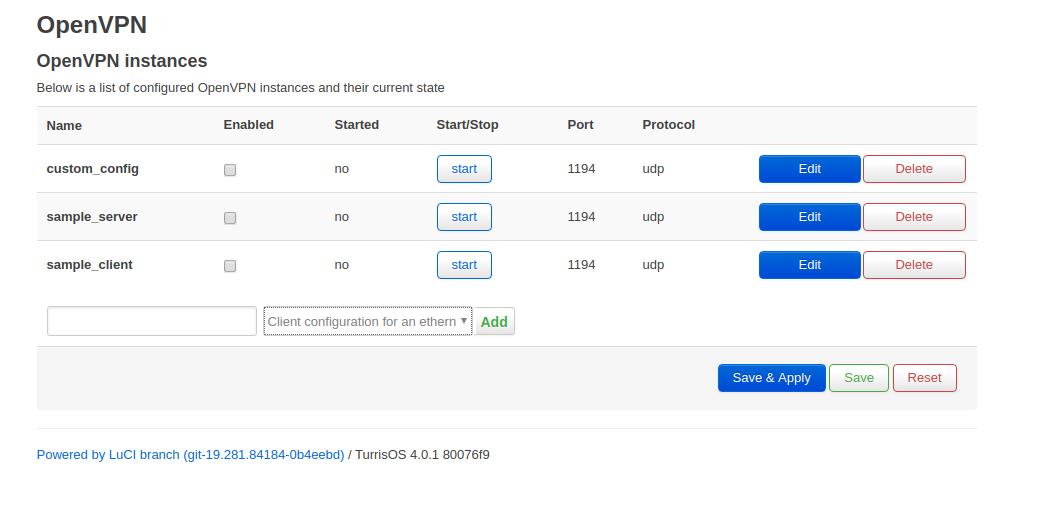
Go 192.168.1.1 → LuCI → Login → System → Software → Download and install package: luci-app-openvpn openvpn-openssl openvpn-easy-rsa → OK → Service → OpenVPN → Load the .ovpn file in and name it → Upload
Edit your created VPN → edit “auth-user-pass” to "auth-user-pass yourcreatednamehere.auth → add this in the option section below:
reneg-sec 0
auth-nocache
connection retry -1
route-delay
keepalive 3 10
resolv-retry infinite
auth-retry interact
ping-restart 0
ping-timer-rem
pull-filter ignore “auth-token”
log /etc/openvpn/openvpn.log
Optional:
You can choose more than 1 location and the router will select one server randomly every time a new connection is established:
remote de-fra.privatevpn.com 1194 udp
remote de-fra1.privatevpn.com 1194 ud
remote [Add how much server you want]
remote-random
→ in the extra box below you write your login data in 2 lines like this:
Username/Email
Passwort
→ after this save and go back
3. click on the enable Checkbox(VPN only work when this is checked, without the checkbox the start button do nothing (User Experience very bad) → save % apply → Start the VPN with “start” → There should be now a yes for started!
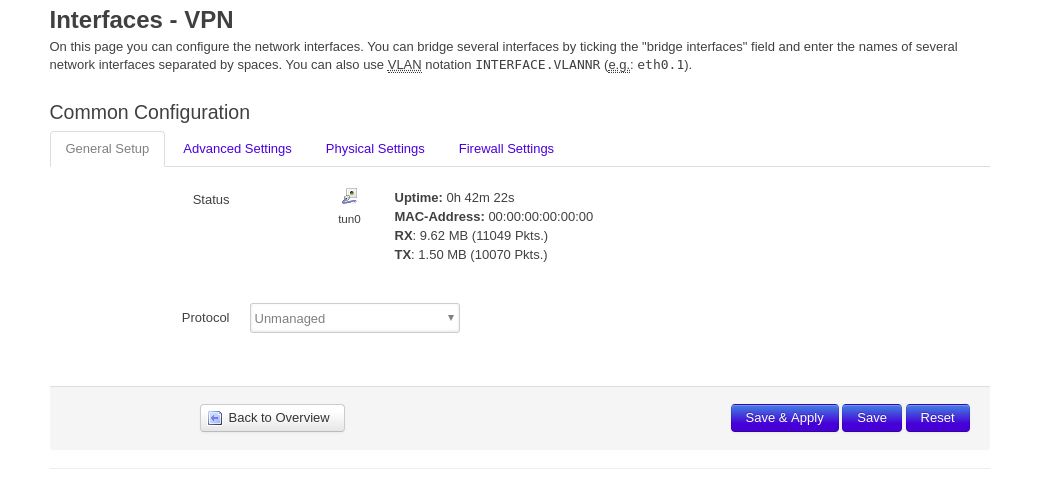
Go to Network → Interfaces → Add new interfaces → Named it like you want, i used “VPN” → Protocol: Unmanaged → On the new created Interface “Edit” → Advanced Settings "Bring up on Boot checked and "Use built-in IPv6-management unchecked → Physical Settings → Custom Interface type in: tun0 → Save & Apply
WARNING: Don’t create a new Firewall in the Firewall Settings here, your Turris Omnia will crash and you must do a reset!
Go to Network → Firewall → Add → Name it: VPN or what you want, Input reject, output accept, Vorwort reject, Masquerading and MSS clamping checked, covered networks: VPN(your created interface), Allow forward form source zones: lan should be checked → create
Change nothing with your wan, should look the pictures i uploaded below, there should be a arrow with reject on VPN and Wan. → Save & Apply all
Edit now the Lan on the same page → Allow forward to destination zones: VPN checked → uncheck all wan, because you don’t want a dns-leak
Now your vpn should work and your internet will only work with VPN
→ For a stable connection without manual reboot in the router (Connection down → openVPN Settings → Stop / Start → Connection Online) and with the use of “remote-random” you can get a always on connection with server roulette when the connection is down and reconnect:
[Put Your Cert-Code here, if is not provided form your vpn-provider and you can’t find the ovpn-file with the code in it]
-----END CERTIFICATE-----
</ ca>
< tls-auth>
-----BEGIN OpenVPN Static key V1-----
[Put Your Key-Code here, if is not provided form your vpn-provider and you can’t find the ovpn-file with the code in it]
-----END OpenVPN Static key V1-----
</ tls-auth>
key-direction 1
My VPN provider is different I will try if these setting is useful with that. Have you ever tried NordVPN with that? Try nordvpn with 30 days moneyback guarantee if don’t work then claim refund. At least this will help us with turris setting here. or Do you think vpn sites like bestvpnguru.com provide good details about vpn and we should go through with them.
I think that’s good vpn-providers on this list. The problem is with NordVPN and other VPN Providers is that there are located in usa. For a save data environment you can’t choose usa companies because of the NSA etc. Because if the want your data form the vpn provider, they get it. There a lot of stories from a data leak in the usa. So choose only vpn providers from European countries with a good social policy like schweden, Austria, switzerland or sweden for example.
Don’t get my wrong i like lot of things in the usa and a lot of companies but the government is on of the worst in the hole world.
A minor quibble I have is that one of the images is incorrect, which is mentioned:
Picture Correction: Lan => VPN (not wan too, because than you’ve got a DNS-Leak)
But I overlooked this the first time. I would suggest retaking the screenshot to avoid confusion, or at least making that bold. Anyway, just a suggestion. Thanks again!